This article will describe how you can send enforcement base messages to Microsft Teams from your Aruba ClearPass Policy Manager. I will focus on the connection to MS Teams and the enforcement itself. Neither the basic setup of ClearPass, MS Teams nor the authentication or device profiling will be covered.
Prequesits
- ClearPass Policy Manager with configured authentication services
- Administrative acces to the settings of a Microsft Teams Team
- Network Access Device e.g. Access Point, Switch (a device where you authenticate your endpoints)
Create a Webhook in your MS Teams Team
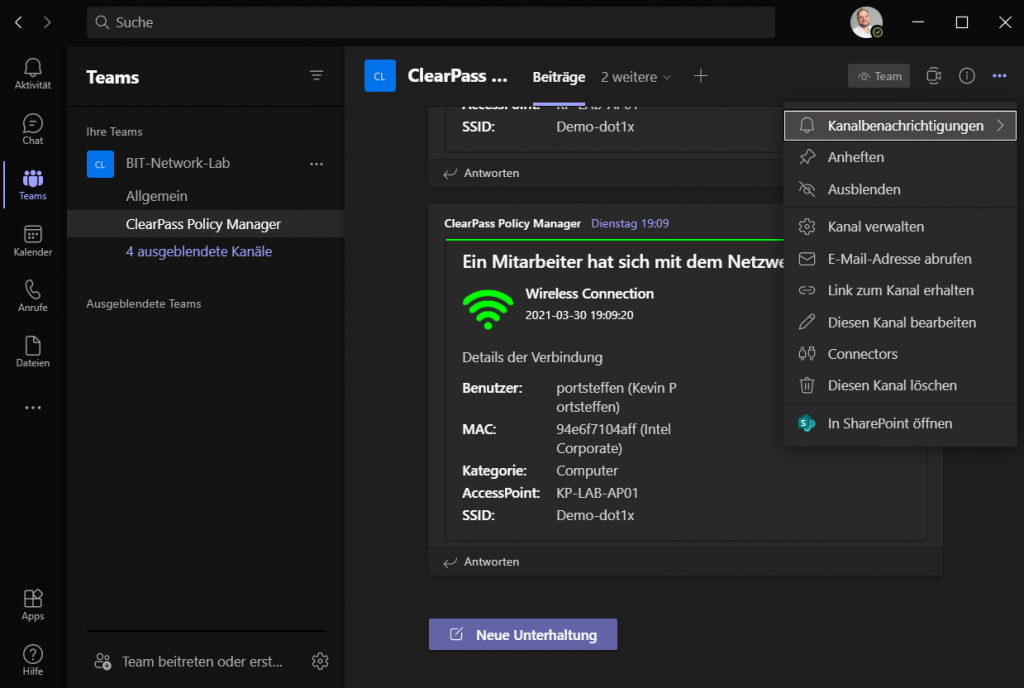
Open the your MS Teams Team that should receive the messages. Click the three dots at the upper right corner. Choose Connectors.
Filter for Incoming Webhook.
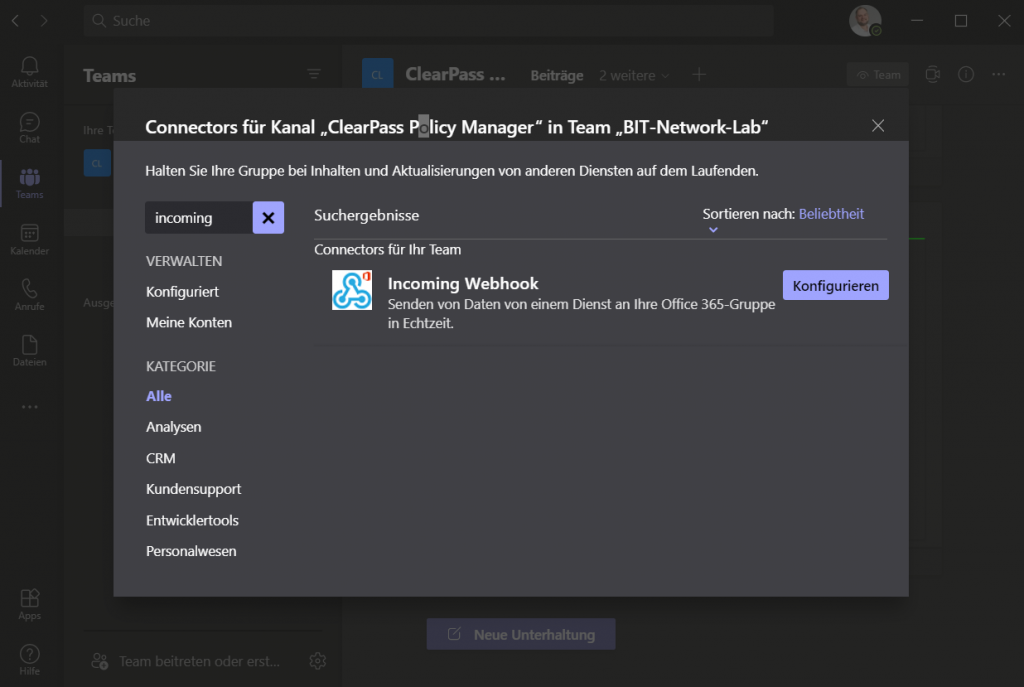
Click configure.
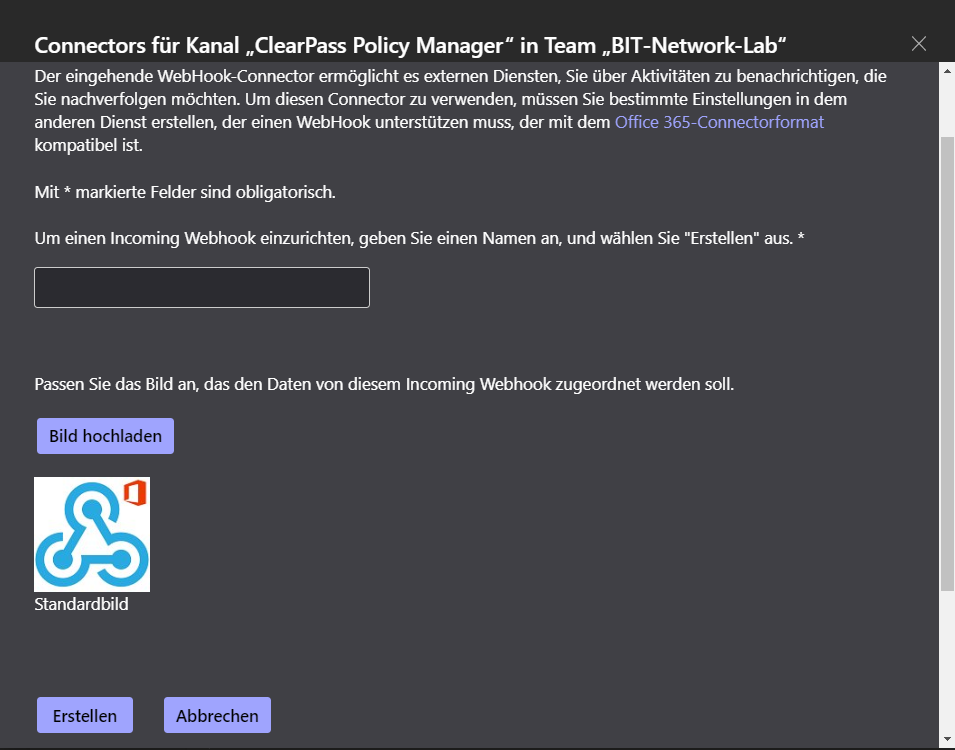
Enter a name for your webhook and upload a picture (optional).

Copy your webhook url and save it for the next steps.
Click save.
Add Context Server to ClearPass Policy Manager
Now open the Web-Interface and move to:
Administration » External Servers » Endpoint Context Servers
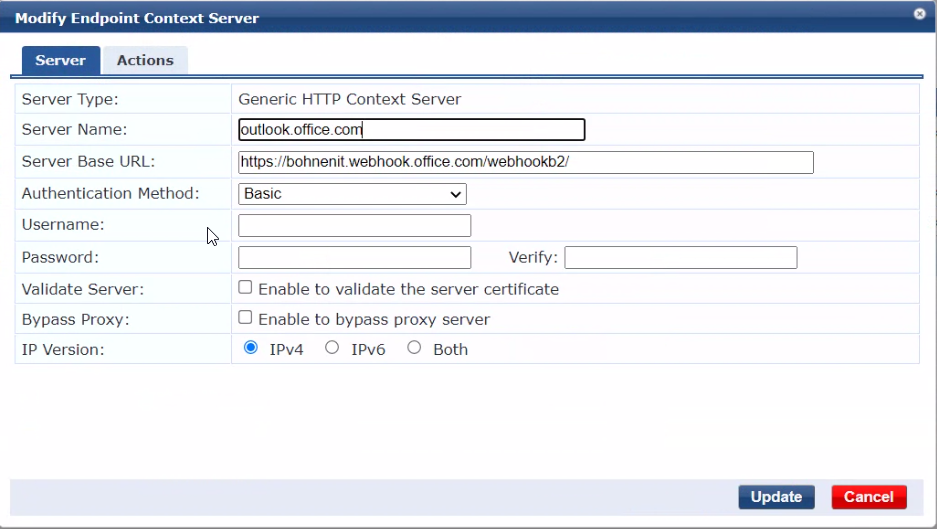
Follow these steps to create a new Endpoint Context Server:
- Click Add
- Select Server Type: Generic HTTP Context Server
- Enter the following:
- Server Name: outlook.office.com
- Server Base URL: <enter the first part of your webhook url including webhookb2/“
- Click Save
Add Context Server Action on ClearPass Policy Manager
Move to:
Administration » Dictionaries » Context Server Actions
Teams_wireless_corp_green
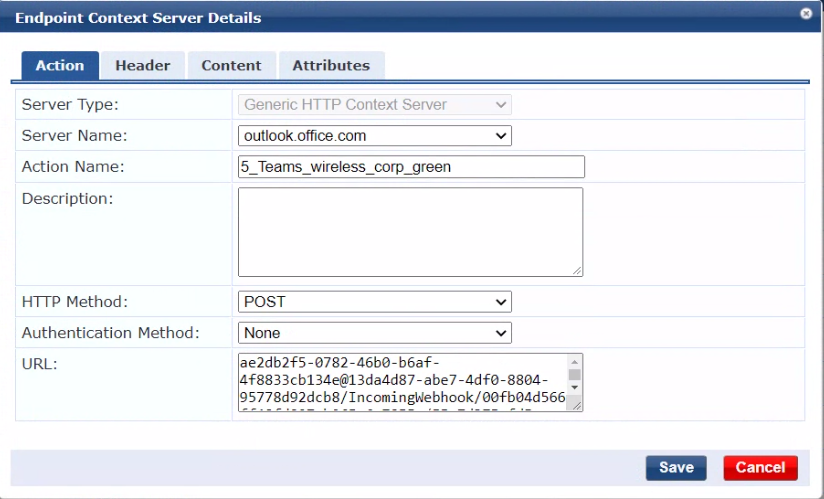
- Click Add
- Select Server Type: Generic HTTP Context Server
- Select Server Name: outlook.office.com
- Enter an Action Name: Teams_wireless_corp_green
- Select HTTP Method: POST
- Enter URL: <Enter everything from the webhook url after webhookb2/>
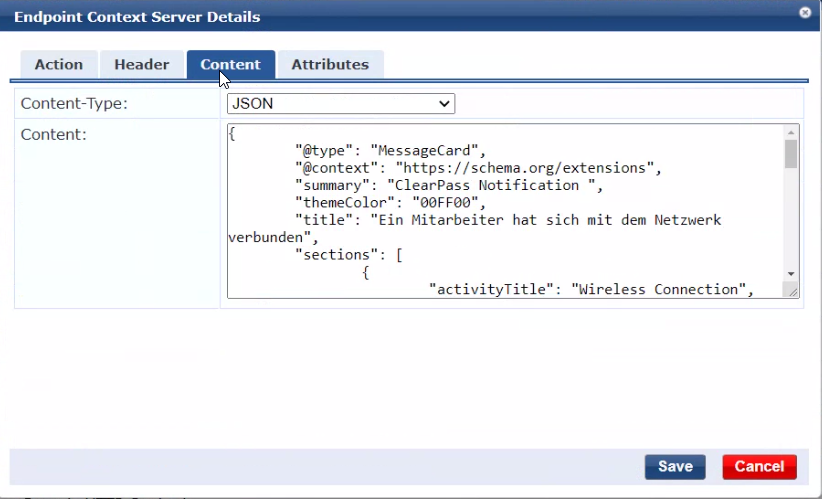
Move to the Tab Content.
- Select Content-Type: JSON
- Enter Content:
{
	"@type": "MessageCard",
	"@context": "https://schema.org/extensions",
	"summary": "ClearPass Notification ",
	"themeColor": "00FF00",
	"title": "An Employee has connected to the Network",
	"sections": [
		{
			"activityTitle": "Wireless Connection",
			"activitySubtitle": "%{Date:Date-Time}",
			"activityImage": "https://www.iconsdb.com/icons/preview/lime/wireless-xxl.png",
			"facts": [
				{
					"name": "User:",
					"value": "%{Radius:IETF:User-Name} (%{Authorization:LABKP-AD:Name})"
				},
				{
					"name": "MAC:",
					"value": "%{Radius:IETF:Calling-Station-Id} (%{Connection:Client-Mac-Vendor})"
				},
				{
					"name": "Category:",
					"value": "%{Authorization:[Endpoints Repository]:Category}"
				},
				{
					"name": "AccessPoint:",
					"value": "%{Radius:Aruba:Aruba-Location-Id}"
				},
				{
					"name": "SSID:",
					"value": "%{Radius:Aruba:Aruba-Essid-Name}"
				}
			],
			"text": "Connection Details"
		}
	]
}- Click Save
Add Enforcement Profile to ClearPass Policy Manager
Now we have to tie our actions into enforcement profiles.
Move to:
Configuration » Enforcement » Profiles
Teams Message Enforcement
- Click Add
- Select Template: HTTP Based Enforcement
- Enter Name: e.g. Teams_wireless_corp
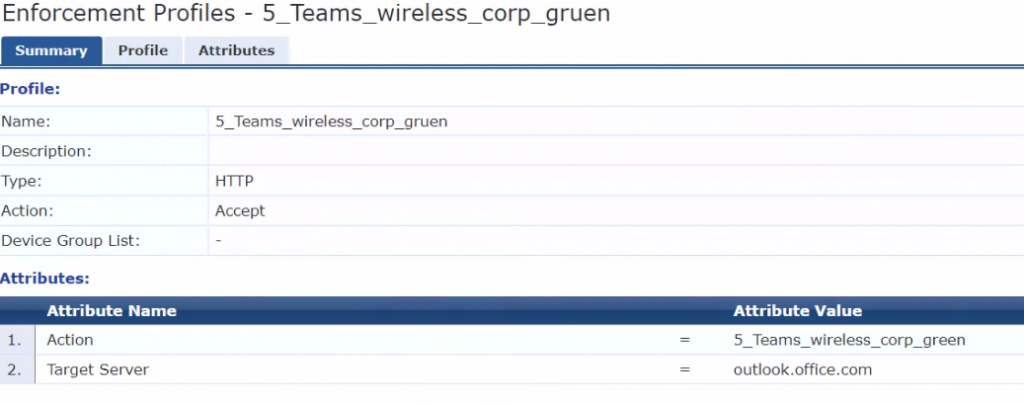
Move to the Tab Attributes.
- Choose Target Server Value: <outlook.office.com>
- Choose Action Value: <Name of the Context Server Action>
- Click Save
Add your Enforcements Profiles to your Enforcement Policy
Last but not least, make sure to add both Profiles to your Enforcement Policy. Start with the on to switch the light on, followed by the one to switch the light off after 10 Seconds